
This technique is pretty rewarding and seems more complicated than it might be. Just a bit of a wait between steps.
I first saw something similar on Layers of Ink around Christmas time. Anna-Karin linked back to Tim Holtz. And then Irini sent me her fab flower so had to investigate further. She would like me to tell you that her flower making skill for this bloom came from Miss Art's Papercrafting class.
First step? Raid hubby's shop for some aluminum tape or head to the local hardware store. This pretty silver stuff is used for sealing stove pipes.
My first step was to threaten an eminent raid on the garage. Since I didn't know where this tape was located, I was going to have to paw through a variety of well organized totes. (Similar to when someone wanted to borrow my glue gun and thoughts of THE MAN looking through scrap drawers...) Yeah, I knew the threat would work. He brought it in to me to avoid a possible raid.
Step two, cover a sheet of thicker card stock with this metal tape. Don't worry about the seams since the painting step will cover that up. And embossing and sanding somehow make them mostly melt away.
Step three, using your favorite embossing folder and machine (I used my Big Shot) run through once to get a sheet like you see on the bottom.

Step four, whip out a handy dandy cookie sheet and your favorite colors of paint and perhaps a mist?
I didn't have any lovely colors of paint I was dying to use, but did want to have a pink flower, so kinda made my own paint with some mist and plain ole cream colored paint.
I used a scraper (old credit card will do) to get the paint in all the crooks and crannies. And then the roller to get a nice even coat.


Step 5 is drying and sanding!
I recommend letting it dry for an hour or two and then sanding. Paint comes off MUCH easier that way. One I waited all day before sanding and really had to put my arm into it...

So, now that you have a nice sanded sheet of metal paper, you then have to decide whether you wish to make a flower with it or a perhaps a die cut.

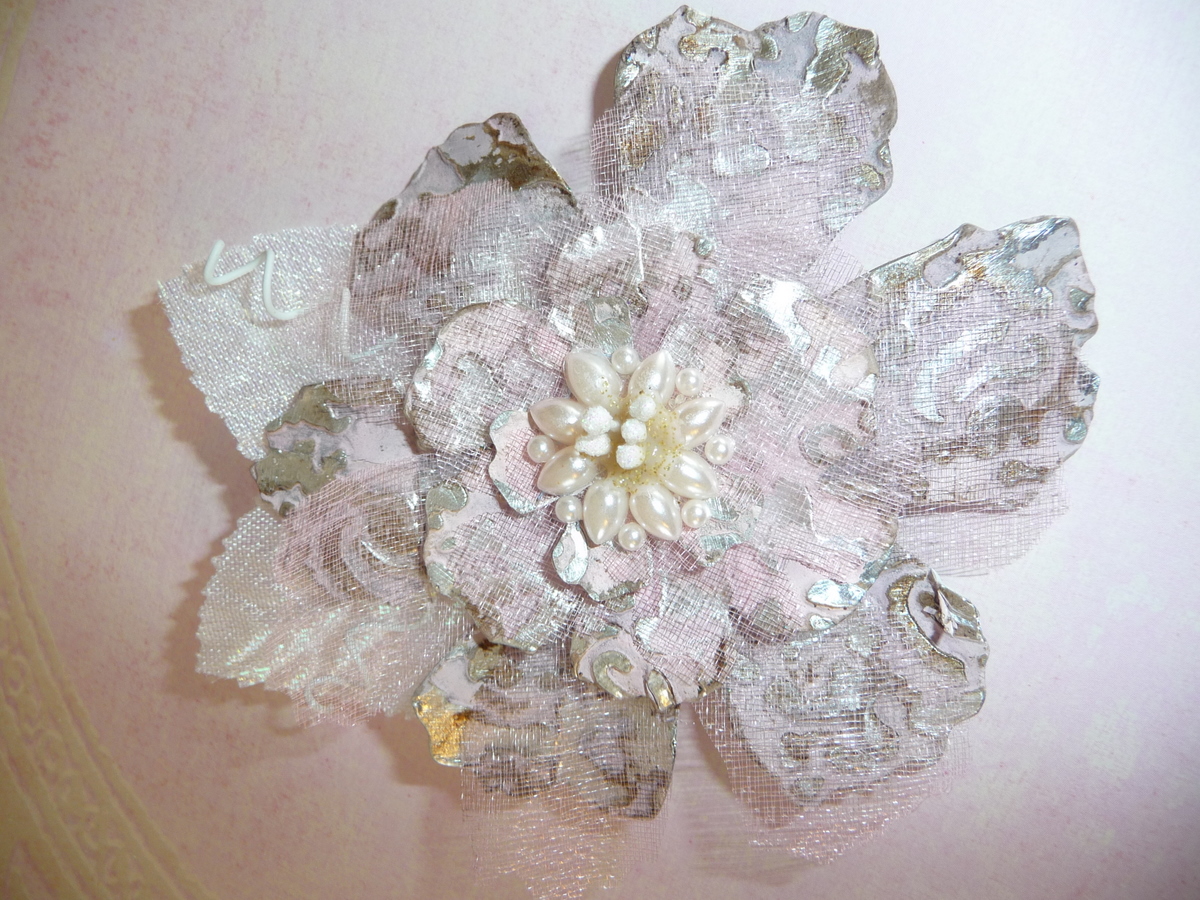
On my flower, I used the Tim Holtz tattered floral die to cut out the parts I needed. If you notice above, I didn't use the daisy type flower when I assembled. I just thought it looked better.
Also, I liked the metal but wanted to add a bit of pink shimmer so cut out the flowers using a shimmery pink fabric and added that.
You can then hot glue the pieces together, use a brad, etc.
Of course, another alternative would be to use your die cut machine to cut out a shape to use on a card or accent your scrapbook page.

This is the top note die from Stampin' Up that I have gotten A LOT of mileage out of.
Now, this example has a copper hue. Either you can use copper foil from stained glass to get a similar look or ink. I used pigment ink on this piece although I have some larger sized sheets of copper coming in the mail to play around with.
I am sure Tim Hotlz sells sheets of sticky backed aluminum so there is also an option your local scrap store will carry it!
And there you have it! My version of metal embossed paper!
And as always, if there is something you'd like more clarification on, please leave me a comment or shoot me a note. I love hearing from fellow scrappers!
HI.. for some reason my blogger hasnt shown me your new posts, so here i am now!! wowwweeee! i love the lamp! the flowers are amazing!! certainly gives it new life... and the metal flowers.. incredible.. they look stunning..and what else did i see?? the layouts for another freaky challenge.. fabulous... and the layout for OUAS- amazing.. so love your journalling too...
ReplyDeleteWow! The flower looks awesome! I'll have to give this a try! Tks. for sharing!
ReplyDeleteAmazingly gorgeous! Looks like fun!!
ReplyDeleteHere's the link yhttp://www.creative-scrappers.com/store/index.php?main_page=index&cPath=6ou need to the book
You can also find it in the right hand side sidebar...
Happy weekend :)
Looks gorgeous. Thanks for the tip!
ReplyDeleteIt's even prettier than I imagined in my mind! That tape is on my shopping list. I always giggle when I see the cookie sheet make its appearance. Oh the wonders that has seen!
ReplyDeleteThank you for the great tutorial. :)
Your embossed metal flower looks absolutely stunning! Love it. WOnderful textures. Thank you for linking my project!
ReplyDelete