Friday, May 6, 2016

B is for Boy Card for THE CUTTING CAFE


A girl I work with (affectionately referred to as Mother Tucker) on my team is preggers and she just had her gender reveal the other day. For those of you past this point in your life, there is this new thing where you get dark colored balloons (or cake) and then when you pop the balloons, confetti inside tells you if they are having a little boy or girl. Anyhow, she is having a boy, which is where I got the idea for my card.


Of course since I haven't had a lot of time for playing with paint or inks I had to go all out and add splatters, stamps, bling, and hand dyed ribbon. Good thing I started with a strong base....

I used a step card from THE CUTTING CAFE. I also kit bashed a file from THE CUTTING CAFE called Baby Word Book for the B. Where I stamped the little boy, it's actually a page cut out with my Silly.


On the second card I used just the words from the file. Really love those embossed letters and that little flower cluster! Looking forward to getting this card off to some new parents I know...I hear they haven't been sleeping much so I think I'll pair up the baby gift with some tea!

Happy Friday!

Thursday, May 5, 2016

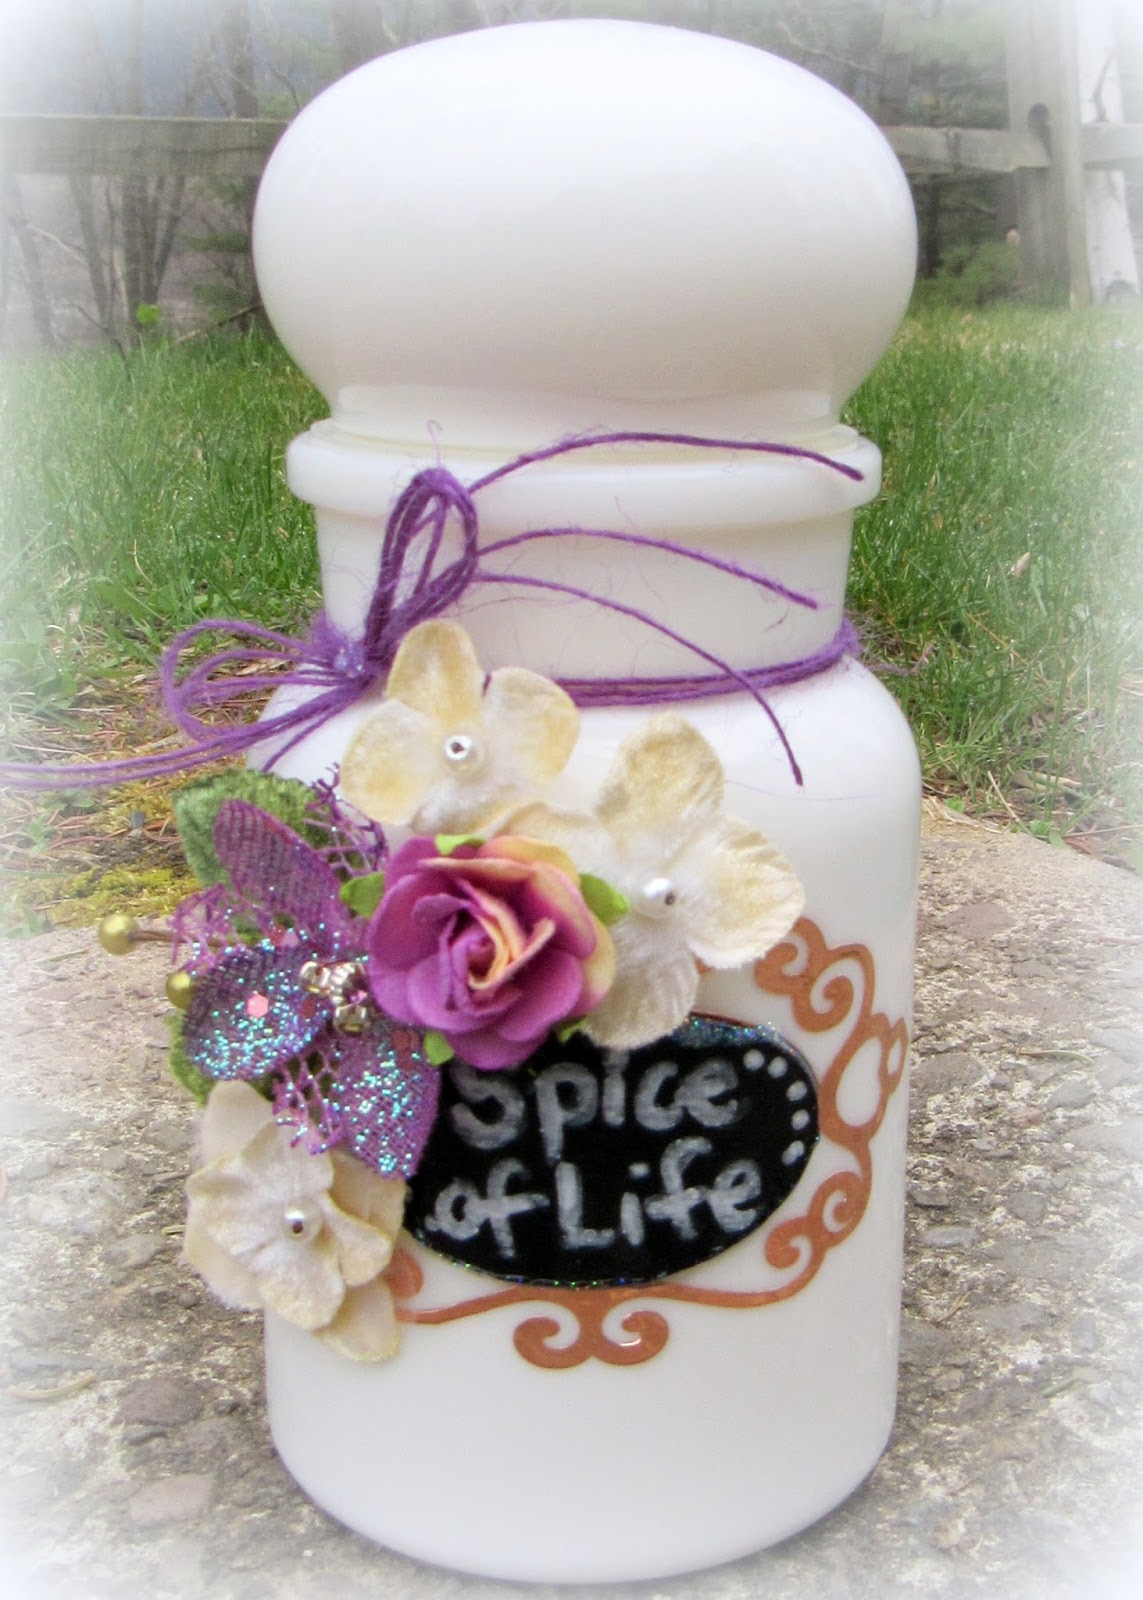
Spice of Life Milk Glass Jar with Faux Chalk Board Tag for LESSology


This is the second milk glass jar I've found while junkin'....in fact the first one was for LESSology's sewing challenge. Love that look! This lovely bottle is for this month's chalk board challenge. I had a couple of ideas for bigger projects, but then opted to stick with something simple as we were getting ready for our trip.


The faux chalk board label was easy peasy to make when you have a white marker. I cut one label out of the sticky backed copper foil by Ranger and another from scrap cardboard. The cardboard piece got a quick coat of black spray paint and then was cut to fit inside the copper one. I wrote "Spice of Life" on it with a white marker and then hot glued it in place.  Added some prima and petaloo flowers to decorate.


Check out how cool of a sticker that copper foil makes! Love that die too. It's Fancy Tags 2 by Spellbinders.


Since the top is sealed & a stopper, I might just store tea in here at work....right now I'm enjoying looking at how pretty it is!

Hope you get a chance to play along with us at LESSology or even give that copper foil a try!

Happy Thursday!

Tuesday, May 3, 2016

Beads & Beans Necklace


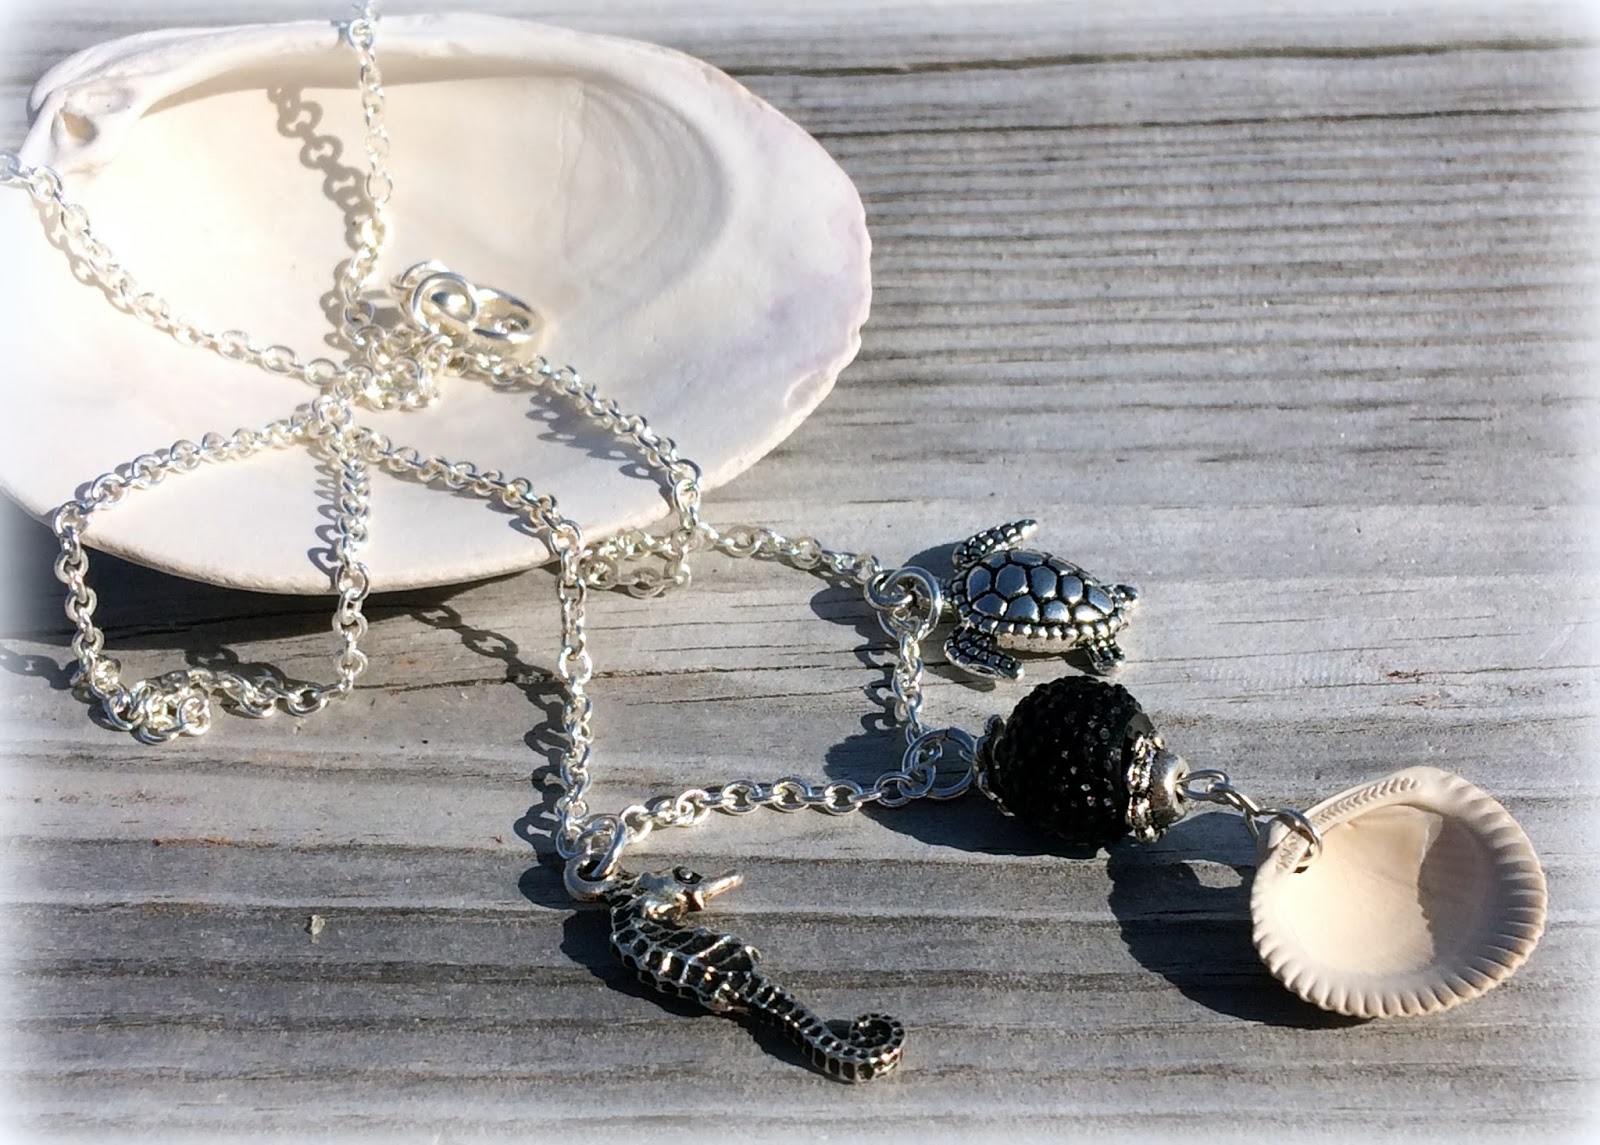
Where we stayed in the Outerbanks was near a Bead Store/Coffee Shop aptly named Beans and Beads. It was EPIC. My sister in law in fact announced her intentions to work for "the bead lady" so she could stay by the sea. Lexi wanted to make a necklace for a friend, so we picked out a few charms and the metal chain. THE MAN of course had pliers so it was fairly easy to get this whipped up and ready for gifting right in the camper.


The main difficulty was picking just a FEW beads when we had so many lovely choices! I for one am sad I didn't buy the mermaid charm myself.


Check out this drift wood tree! I love it! I spent quite a bit of time looking for bits of that myself. I have a plan you know...I always have a plan...


Of course, I had to spend some time and visit my favorite cabinet. I had a moment over this last year and the love is still going on strong this year. Yes, WANT IT badly! ;-)


And I'll leave you with one last close up of Lexi's necklace. We found that shell with a premade hole in it, so it was perfect!

The owner also has an Etsy store that is just lovely! I'm including it here in case you are interested in some pretty hand made jewlery or ornaments!

Happy Tuesday!

Monday, May 2, 2016

Memorandum Monday: Hitch Itch and Camper Queens


Last week my new boss asked what OBX stood for. I had used those intials when I posted my vacation on the team calendar. It's the slang term for Outerbanks, NC, where we went for Spring Break week. After spending nine days in the camper, I thought I'd tell you a bit about what it's like to live in a tin box with wheels for a while.

For me, I am a bit of a gypsy at heart. I love hitting the road and driving someplace new. Add in a towable house with your stuff in it and it makes it that much better. I do think that the dudes that sell campers and color blind dudes that design campers have missed the mark on a few things though.

I kinda wasn't big on these huge mirrored doors on our bedroom closet. Thought it was a smidge trashy, but turns out they do serve a function as they are great to do your hair and makeup in. It lets one spend less time in the bathroom so that helps Lexi and I get ready. I know you are checking out that bright bedspread. I had to pick something bright to break up all that BROWN. It's the go to color for campers, sigh. I get that having neutral colors are necessary, but..who picks out these interiors? I suspect dudes...us girls would at least have a couple of other options with trendy colors....

A lot of campers have camper queen beds. They LOOK like queen sized beds but will be shorter. If you are a tall person like THE MAN, your feet will hang out. Also, they typically use terrible mattresses, which is dumb. If you are going to the effort to haul a large metal heavy box hours and hours away, you deserve a great mattress. Ours thankfully does.

I could go on...

The toothbrush holder is too small to hold modern day tooth brushes, the toilet paper dispenser that never gets hung because there isn't any room in the bathroom for it, the icky curtains that match the bedspread that never stays on the bed because it will only survive one or two washes....


I do however LOVE the concept of bunk houses...where kids can just sprawl and do their thing....I avoided going in there as their mound of laundry and unmade beds were terrifying. We did promise to leave them alone on that end as it was a vacation and so I did.


And here is to sink covers, turning your counter into a scrapbook area! Started a ton of pages for all those vacation photos! Looking forward to getting some photos printed and scrapped!

I have been home for less than a day. Long enough to get the mound of laundry tamed and mow the lawn and I'm ready for new adventures. Camper peeps call that Hitch Itch! Guess it's time to get some of those places booked!

A wave over to Sian From High in the Sky, our host of Memorandum Monday who hopefully has had a little warmer weather by now. Ours is cold and wet today, but it's a good day to get started on some pages.

Sunday, May 1, 2016

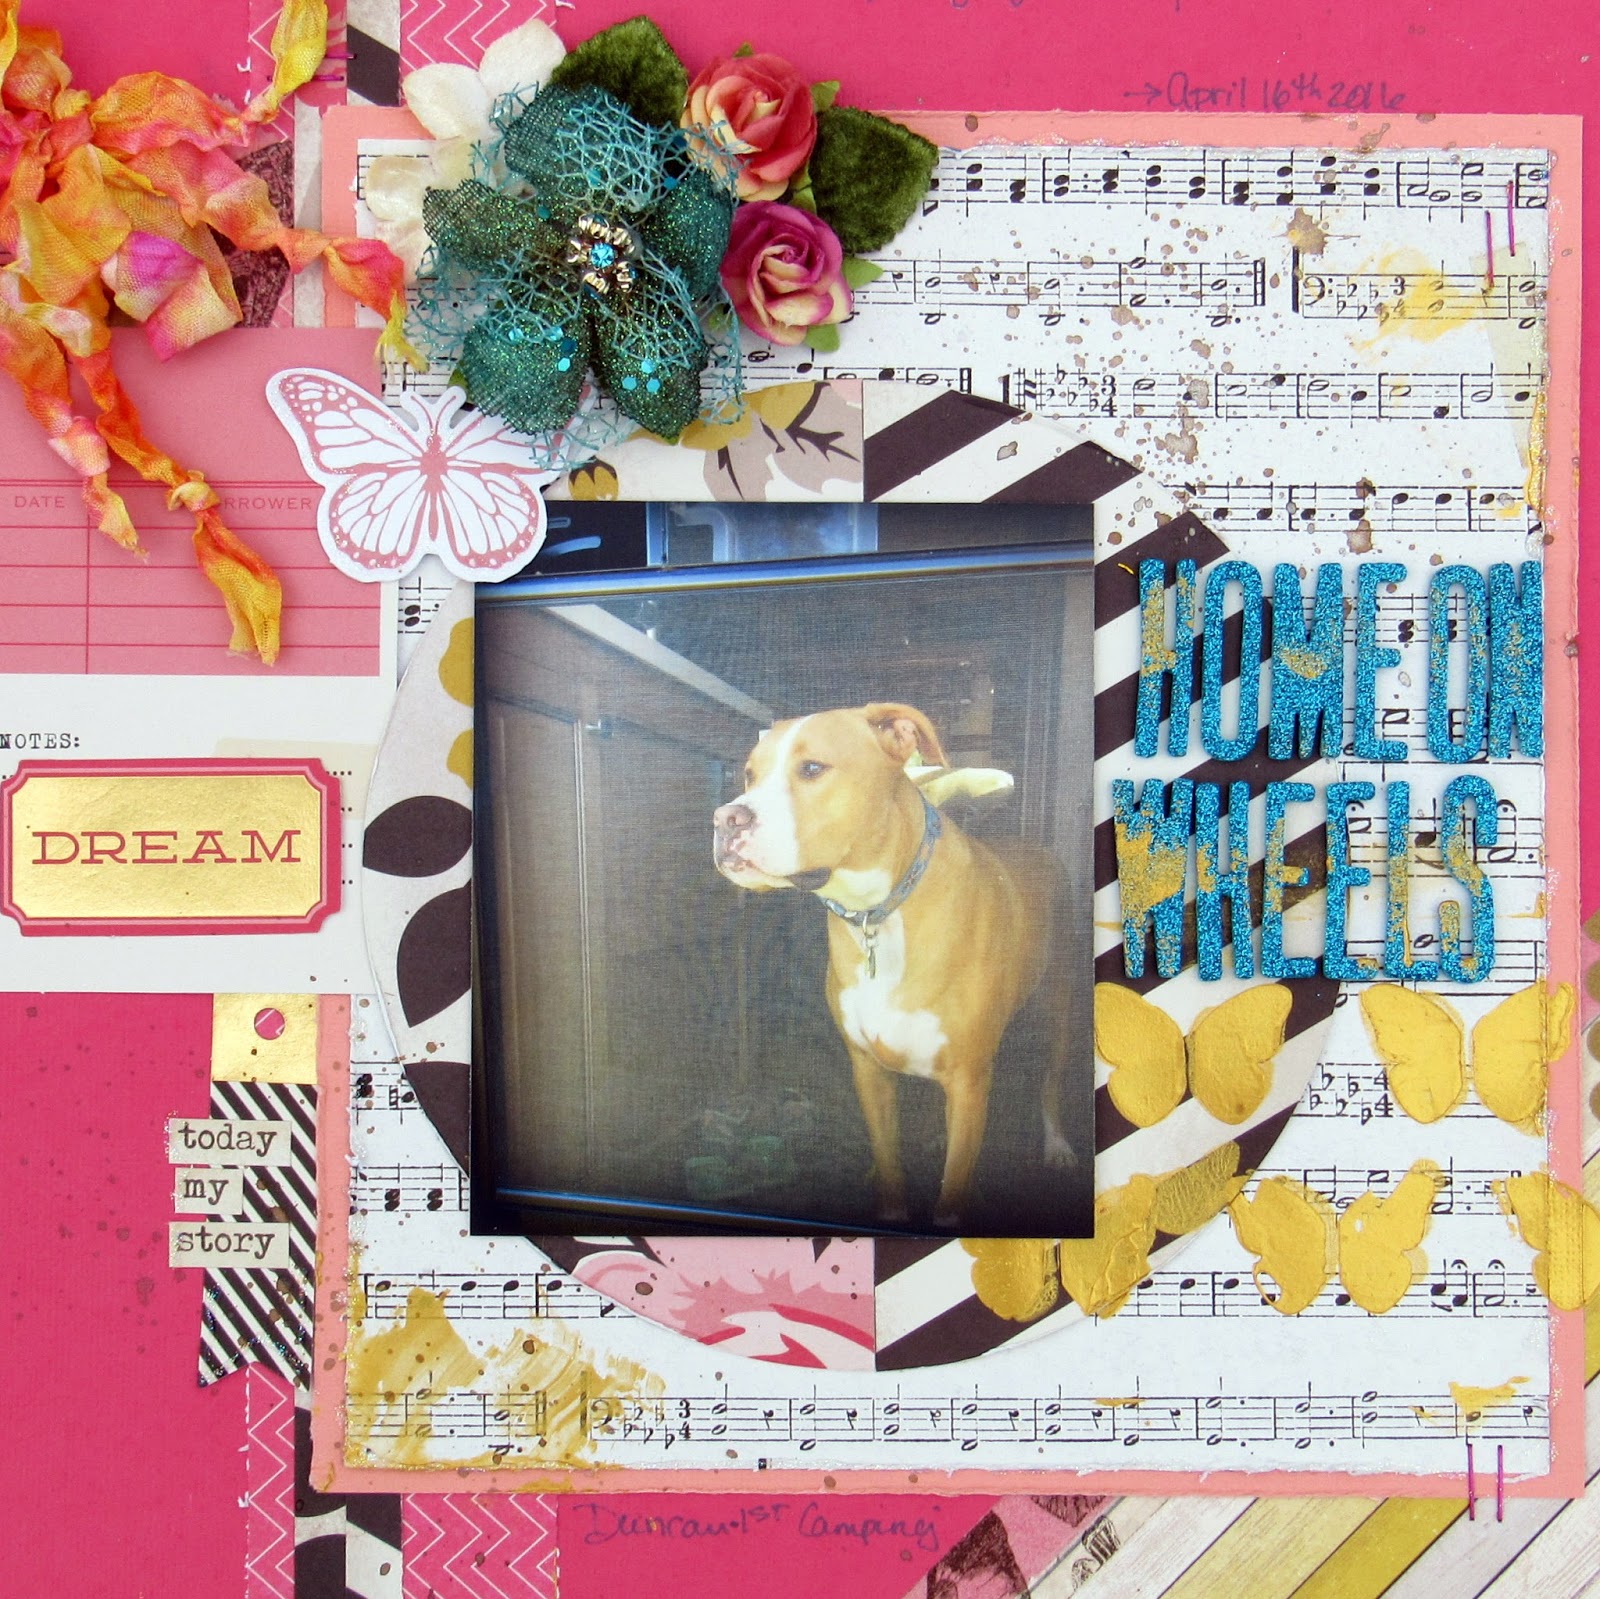
Home on Wheels Layout for Another Freaking Scrappy


Love it when a plan comes together! Anne over at Another Freaking Scrappy asked us to scrap about our favorite place for this month's challenge! My favorite place has wheels, my family, and my dog! This past week we spent a week in our camper one dune away from the beach. I even found time to do a little bit of scrapbooking! More about that tomorrow!


I zoomed in and took a photo of just the screen door & Duncan. He likes to watch the neighborhood from the doorway. I added some gold stenciled butterflies, gold tags & a turquoise sparkle title. Then paired that up with that large bloom from Petaloo.


Love the layering, especially that music paper! Back again tomorrow with Memorandum Monday and a few photos from our trip!

Come play along with us at Another Freaking Scrappy! Betcha you have a cool favorite place too!

Thursday, April 28, 2016

Crazy for Upcycled Cloches


Oh dear spring, how happy I am you have finally arrived! So happy I've been planting! These little glass choches were at the Restore a bit back and I paired them up with a plate, tea cup, and glass votive. It's amazing how easy it was to put them all together! Epoxy is really my new favorite adhesive!


The ribbon makes them extra cool in my book. I hand dyed some seam binding & crinked it up!


I used a part of a drawer pull painted gold to thread the ribbon through. It was perfect! A little epoxy holds it on the glass.


The most awesome part is I think these glass domes get me outta watering....rock on!

Happy Thursday!

Wednesday, April 27, 2016

Weaving Collaborative: Grandma Ireland Rainbow Woven Dream Catcher


Every so often the very talented Tina Walker (who blogs over at A Dog's Life) organizes a collaborative between artists. This time 'round it's a weaving one! I was rather interested to give it a whirl, but I didn't have a loom so had to make due.

First up was finding something to start with. Located this round hoop at the ReStore. The doily was already in place, but was a rather hot mess. I removed a ribbon someone had woven in, bleached the doily, and spray painted the hoop. 


I colored the stretched doily with some stamp pad ink and then added that lovely photo of my Grandma Ireland and some little flowers. 


Added the little weaving at the bottom. Alternated with some fluffy soft yarn and some hand dyed string. The friendship pin & gold thread was the last addition. Loved the idea of a friendship pin..remember those from back in the day?


Currently my little wall hanging is hanging out with a few other things I love in my studio, but soon it's off to my Mom because she really likes that photo of my Grandma!

If you want to take a hop around the other weaving projects, the links are below!

Martha Richardson

Beth Soler

Albion Gould

DeeDee Catron
l
Tina Walker

Laura Mooney

Robyn Crowningshield

Happy Hump Day!

Tuesday, April 26, 2016

Hooray Layout (not quite Kraft + but close)


I was inspired to make this page by the Kraft + white and black challenge, however once I got part of it made, I veered off course and added some blues and greens in.


Although it's a manly page, adding those flowers really made me happy! And since Lizzy Hill is on the DT, added some really cool feathers I found! (waving, hi Lizzy!)


Added a small strip of teal washi that has planes on it. Since this is Civil Air Patrol, I thought it was fitting! Really have been enjoying getting to make a few more pages lately. It's funny how we go through stages with the creative process!

And how do you like that photo? Luke is ranking up again in Civil Air Patrol! So proud! Loved this photo! Thanks Beth for hooking me up!

Happy Tuesday!

Sunday, April 24, 2016

Memorandum Monday: Air Plants and Fresh Air


Oh goodness, 25% off at the ReStore for Earth Day and a free re-usable bag, how can one resist! Plus, they had my stuff down there! Wish I could have spent longer, they had all kinds of new goodies out!

Pretty sure I'll be using these two items together...epoxy is my best friend. Not sure what I'll use the handles on but they are epic!


The Corning ReStore had their Earth Day event set up on the construction side of the shop when I went this past Friday at lunch but they were hoping for sunny weather to set up outside the following day.


Can you see those little air plants on the right? I thought of putting those little plants in a little glass cup and ordered them a few from Amazon. I love air plants. I'll have to show you that idea later. Little glass cups seems to be a mainstay item at a second hand store, so maybe you'll want to give it a try. ;-)

On the subject of Earth Day & buying stuff at second hand stores:

Recycling means less garbage is going into landfills. Did you know: for every dollar generated in sales at the ReStore, 1.3 pounds of material is diverted from the landfill.

Anyhow, we're off this week Spring Breaking which means learning lots of interesting things, getting inspired by new horizons, and spending some time in outside in the fresh springtime air!

Hope Spring has finally sprung for Sian who is our sock knitting, scrapbooking hostess From High in the Sky. I hear she has a new driver, which is awesome, yet slightly scary so I am also giving her a high five!

Thursday, April 21, 2016

Shroom Making Kits for Earth Day at THE RESTORE


I have six mushroom making kits heading down to the ReStore for Earth Day which is TOMORROW! I thought I'd post the directions on how to make these in case you wanted to try them at home.

You will need:

  1. two heavy duty cardboard spools (one with a bottom, one without)
  2. twine and/or Washi Tape 
  3. a doily
  4. two red circles of material
  5. black lace
  6. cotton balls
  7. a pot to plant your schrooms in (we are using gold spray painted punch cups)
  8. hot glue
  9. decorations
You will first need to pull (or cut) the top off your spools so you can build the mushroom part. I hot glued five cotton balls on the top and carefully hot glued the red fabric over the top. Then I hot glued the black lace on. I then hot glued five cotton balls on the bottom. Repeat for the second mushroom. You can add variety by making one bigger or plumper than the other mushroom. 


Add the trimmed lace doily before reattaching the top of the mushroom to the cardboard stem with some hot glue. You can then decorate the stem with washi tape or twine. Pull the bottom off the second spool and cut the second stem at an angle. Add washi tape/twine before hot gluing the angeled stem to the main shroom. 


You can now hot glue the shrooms into the pot. Add more hot glue and attach the moss. Add some greenry or flowers. You can also add a little fairy to the top, a bird, butterfly or something else that is awesome. I added glitter to my mushrooms and a little scotty dog button with flowers to my copper spray painted pot. 

The best part about this project is that with the exception of the twine, moss & cotton balls, it's all upcycled stuff! Happy Earth Day and hope you get a chance to upcycle something! 

Wednesday, April 20, 2016

Epic Metallic Votive Holders for the ReStore


Was playing around with those Olive Garden dipping cups they gave me at the ReStore last week and came up with a combination of glass paint & silver mirror paint that I really liked. Let me show you what they looked like before....


Honestly on the scale of hard, this is a super easy project. I glued the glass candlesticks that are pretty much a mainstay of any second hand store or a dollar store to the bottom of the small dipping cup with epoxy. The kind I used worked in five minutes but cured over an hour so you could do the second painting step right off.


I then painted them with turquoise glass paint. Interestingly enough, the glass paint worked on the ceramic just like it did on the glass. You just mix your paint color with the Vitrea thinner, apply with a large brush, let dry overnight and then bake.


The looking glass paint goes on very thinly so if you don't use a lot, the glass color will show through under it, which is pretty.


You can then decorate your item! Since I used battery operated candles, I opted to make hemp bows and add some petaloo lilac flowers. I also added some washi around my candles so they matched, which is the beauty of battery operated ones!

These are headed to the ReSTore for their earth day celebration!


Tuesday, April 19, 2016

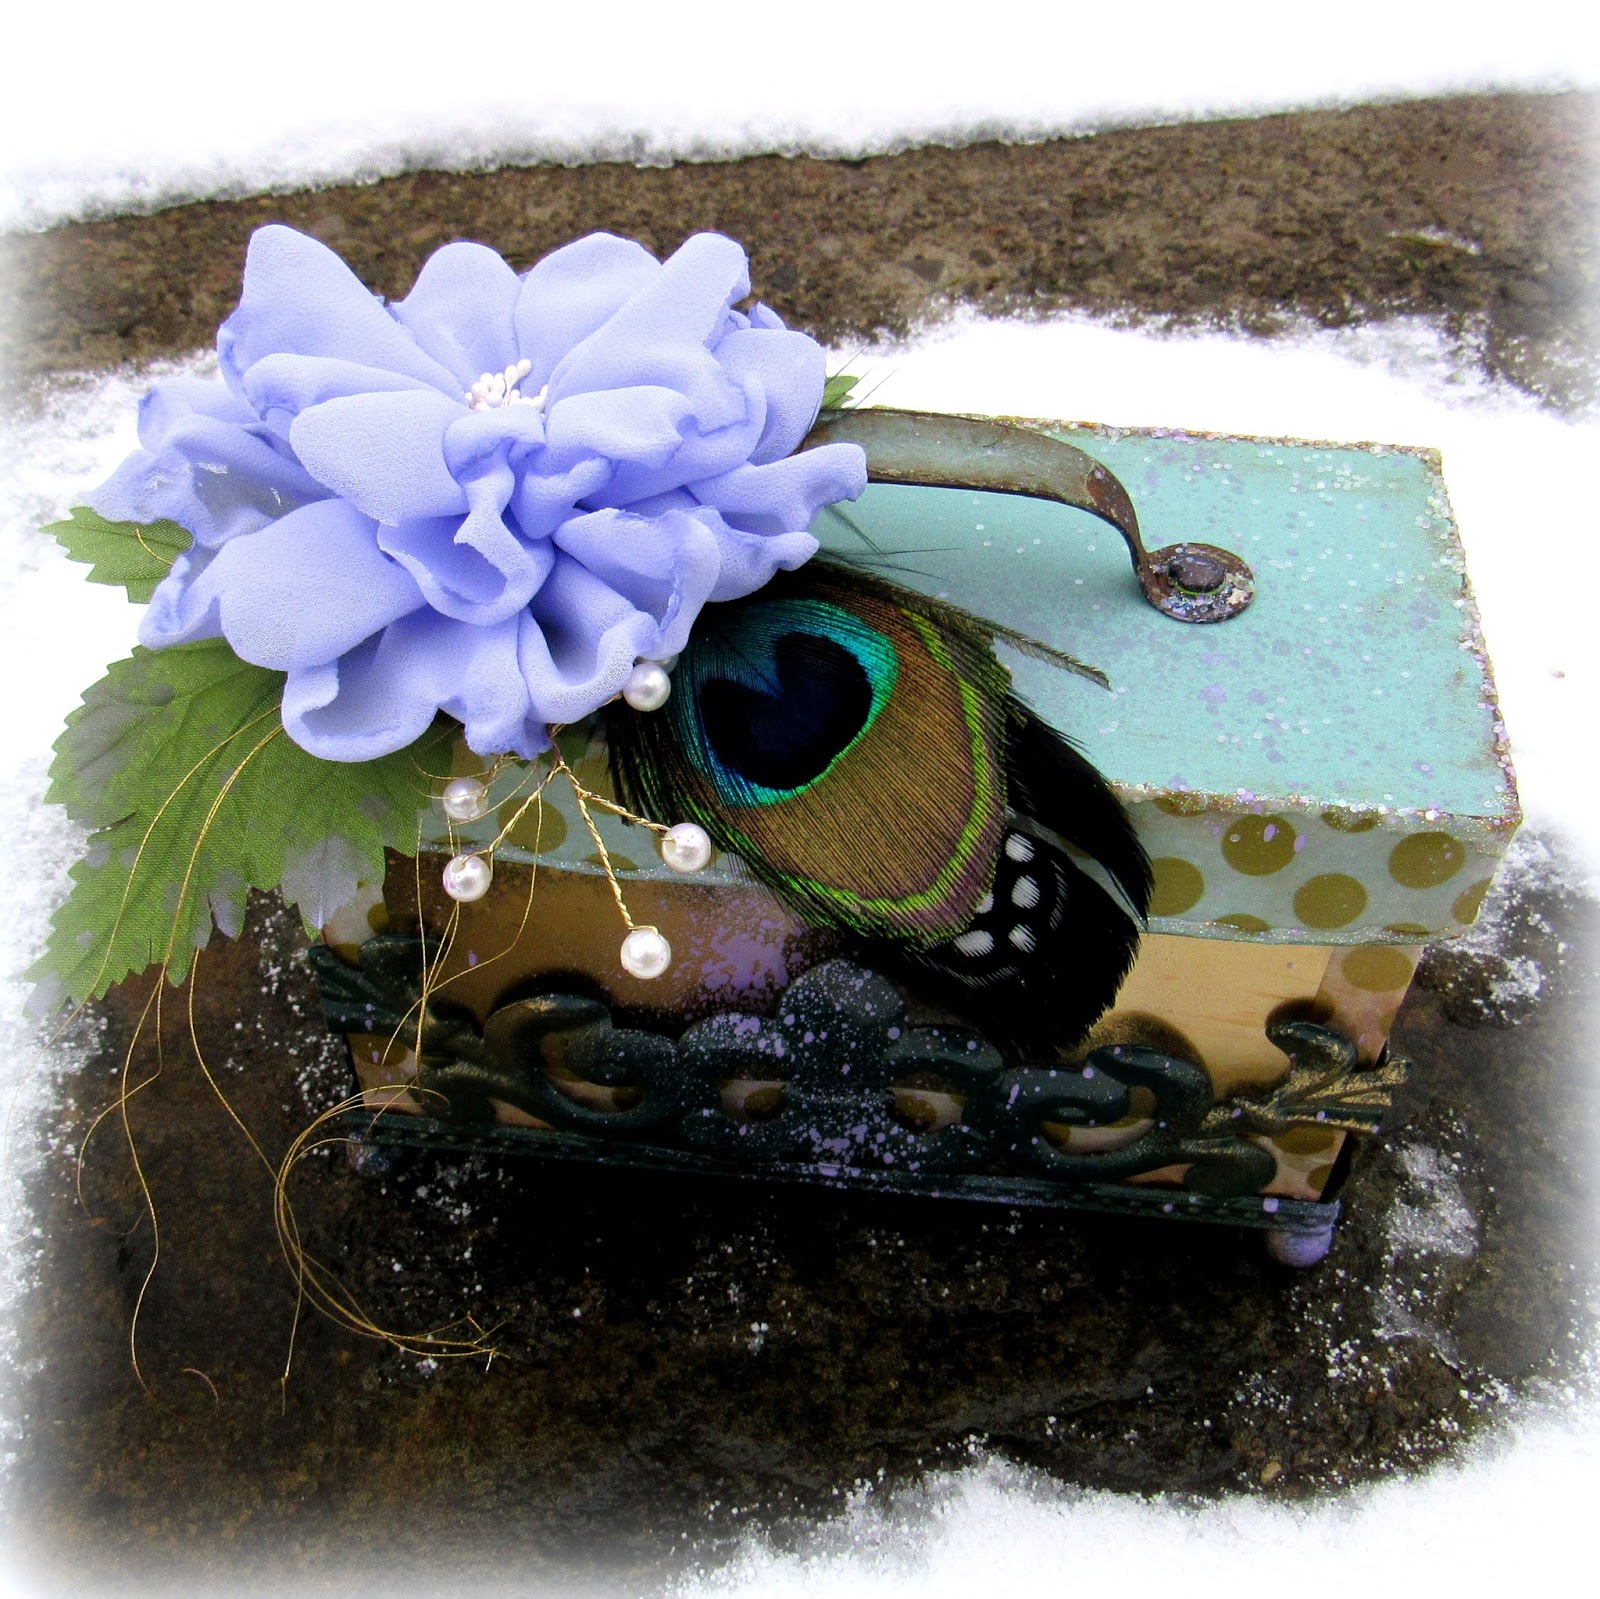
Vintage Peacock Feather Clear Cardstock Box for THE CUTTING CAFE Shop


Have I mentioned how much I love making boxes? This one was a bit tricky as I had that metal caddy that I wanted to use for feet, so measuring was pretty critical to get the box to fix inside it. I used a couple of pieces of scrap paper in the cutter before I got brave and used the clear cardstock that Regina is selling over at THE CUTTING CAFE Shop. The actual box is the Hershey Kiss Window box (minus the window) that I resized a lot.


The genus part of the clear cardstock (besides the part where you can see through it) is that it's very durable. It's also shiny so you are able to spray it with spray paint or heat emboss it. I used just a little gold and purple spray paint. It's also heavy duty and rigid so I wasn't afraid of tearing it when I slid it into the metal caddy.


I cut the top out of paper and you can see that the same spray paint reacts much differently with the paper! I did love the contrast between the clear cardstock and the paper. Totally dig that huge bloom that I got on an etsy store. Wish I knew which one so I could link back to them. It was a purchase long ago and I have been hoarding it! Just like I've been hoarding that peacock feather & that chipped handle! A special box requires pulling out all the stops though!


Huge thanks to Regina for sending me some clear cardstock to try! This box makes me happy! Can't wait to gift it to a friend with something special inside!

Happy Tuesday!